Tuesday, December 15, 2009

Peppermint Plates

This project turned out so cute and I absolutely can not wait to give it to a special friend!
First of all, I was inspired by THIS post. She uses a frisbee, but I happened to have a couple of white, plain ceramic plates (from Ikea, about $1 each) that have just been itching to be used!
So, I used the plate and some red acrylic paint. I also cut a circle (traced a smaller bowl) out of Contact paper and placed it in the center of the plate.
Then, I was ready to paint the red stripes. I did this totally free-hand (meaning, I realize it's not perfect but Maddie was upset that she couldn't "help" and so I had to move fast).
After I was done painting, I peeled the Contact paper off...
Oh. Here it is with the Contact paper ON. You can see the edges in the center circle are a little rough. They go away when you peel the Contact paper up.
Then, I wrapped them in cellophane and tied the sides with some red ribbon (the same ribbon, by the way, that was used on our wedding invitations! Never. Throw. Anything. Out!).
We also propped them up on stands that will go along with the plate.
I think these will be cute Christmas decorations in a friend's home (yes, I made one for OUR home, too)!

Photo Puzzle

Do you ever have a project where all the pieces just magically fall into place? I know. Rare, huh? It doesn't always happen so smoothly, but this was one of those things that came together so simply.
I'd seen this idea floating around blogland, but had yet to attempt it. Although, when I realized that Maddie was no longer doing her shape puzzle (I think it was just too easy), I decided that this would be the perfect thing.
I started off with a shape puzzle. Hers is a Melissa and Doug, but any puzzle would do. Then, I selected pictures of her family members and used the puzzle shapes as a template, cutting out their faces.
I Mod-Podged the pictures into the appropriate shape slot.
I didn't seal the top because they fit so well, but you could Mod-Podge the top of the pictures, too.
How cute is this?! I had every intention to wrap this up for her, but then... I got too excited and gave it to her early. She absolutely loves it. It's great for memory games, talking about special moments (she can tell you where she was, plus a story, from every picture!) and just adds a spark to a once-loved, then ignored toy.
I recently picked up some more shape puzzles and will be making them as gifts for Maddie's buddies!

Saturday, December 5, 2009

Applesauce Ornaments

Quick disclaimer on these little treats: They take a loooooooong time to dry. We baked them in the oven (per the instructions) for two hours and they still had to air dry for four days (maybe we made them too thick?). Also, as you will see, they require some "big people" help, as Maddie would say.
I can't find the exact recipe we used (but there is one HERE), but we used equal parts of cinnamon and applesauce (about one cup each). We also used about a teaspoon of nutmeg and stirred it all up.
We flattened the dough out and used more cinnamon to prevent sticking (just like you'd normally use flour).
Then came the part that was a teensy-bit difficult: cutting them out with cookie cutters. Daddy was a huge help here; it wasn't easy to transfer the cut shape to the baking sheet.
See, he ended up doing it mostly on his own. Thanks Michael. :)
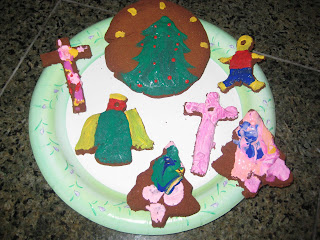
After three bazillion hours of drying time (baked in a 170 degree oven for 2 hours AND left to dry on a cooling rack for four days), they were ready to be painted. We used acrylic paints (and lots of paintbrushes because it's very difficult for my two year old to effectively wash paint out of a brush before using a new color).
And... Paint!
Here are some of our finished creations (I had fun, too). We're going to string a ribbon through, wrap them up, and give them as gifts!

Kiddie Gift Packs!

I'm really excited for these gifts; they were super easy to put together and will, hopefully, be enjoyed! I put together Christmas gift packs for some of Maddie's buddies. Each bag has a craft or baking activity. Everything is included in the bag, as well as directions. Most of these are Advent activities that we've done (and enjoyed) and I wanted to spread the cheer!
Here's a picture of one of the gift packs.
It includes...
The Reindeer Bites bag...
Beaded Ornaments (enough to make 3 ornaments)...
A Soap Surprise baggie...
Gumdrop Tree...
and Glitter Pinecones!
We'll be shipping these out on Monday!

Thursday, December 3, 2009

Glass Tile Necklaces

This picture truly does not do these pendants justice at all. Seriously. I think they are so brilliant (I did not come up with the idea!), personalized and beautiful. They are absolutely easy to put together and make great gifts.
I ordered square glass tiles and bails from a sweet seller on Etsy (let me know if you want her name; it was a great experience) and got out my E6000 glue and Mod-Podge.
I printed out pictures to fit the one inch tile, Mod-Podged it on, then sealed it with more Mod-Podge. I also cut a piece of decorative scrapbook paper to back it with and Mod-Podged that on, too. Then, I used the crazy-strong E6000 to glue the bail on.
Wow.
Those were terrible directions.
Terrible.
HERE is a better tutorial; she uses different glue but you get the picture.
Maddie is going to paint these tiny boxes (about a dollar at Michaels) and we'll wrap the pendants inside.
This project, start to finish, does take a few days. You have to let the glue totally dry before moving on to the next step (which is torture for me; when I start something, I like to get it done). But, they're totally worth it and each one only ends up costing a dollar or so.